Quick Start Guide to Using the Crash Map
Learn how to navigate the map interface and query crash records.
This guide will go over searching for a jurisdiction or route, applying NJTR-1 attributes to filter crashes, and exporting record data for further analysis.

Searching for a Location
This section will go over filtering crashes within jurisdictions or along a route.
Search for a Jurisdiction
Jurisdictions including counties and municipalities can be searched in by using the Filter Menu or Search Bar.
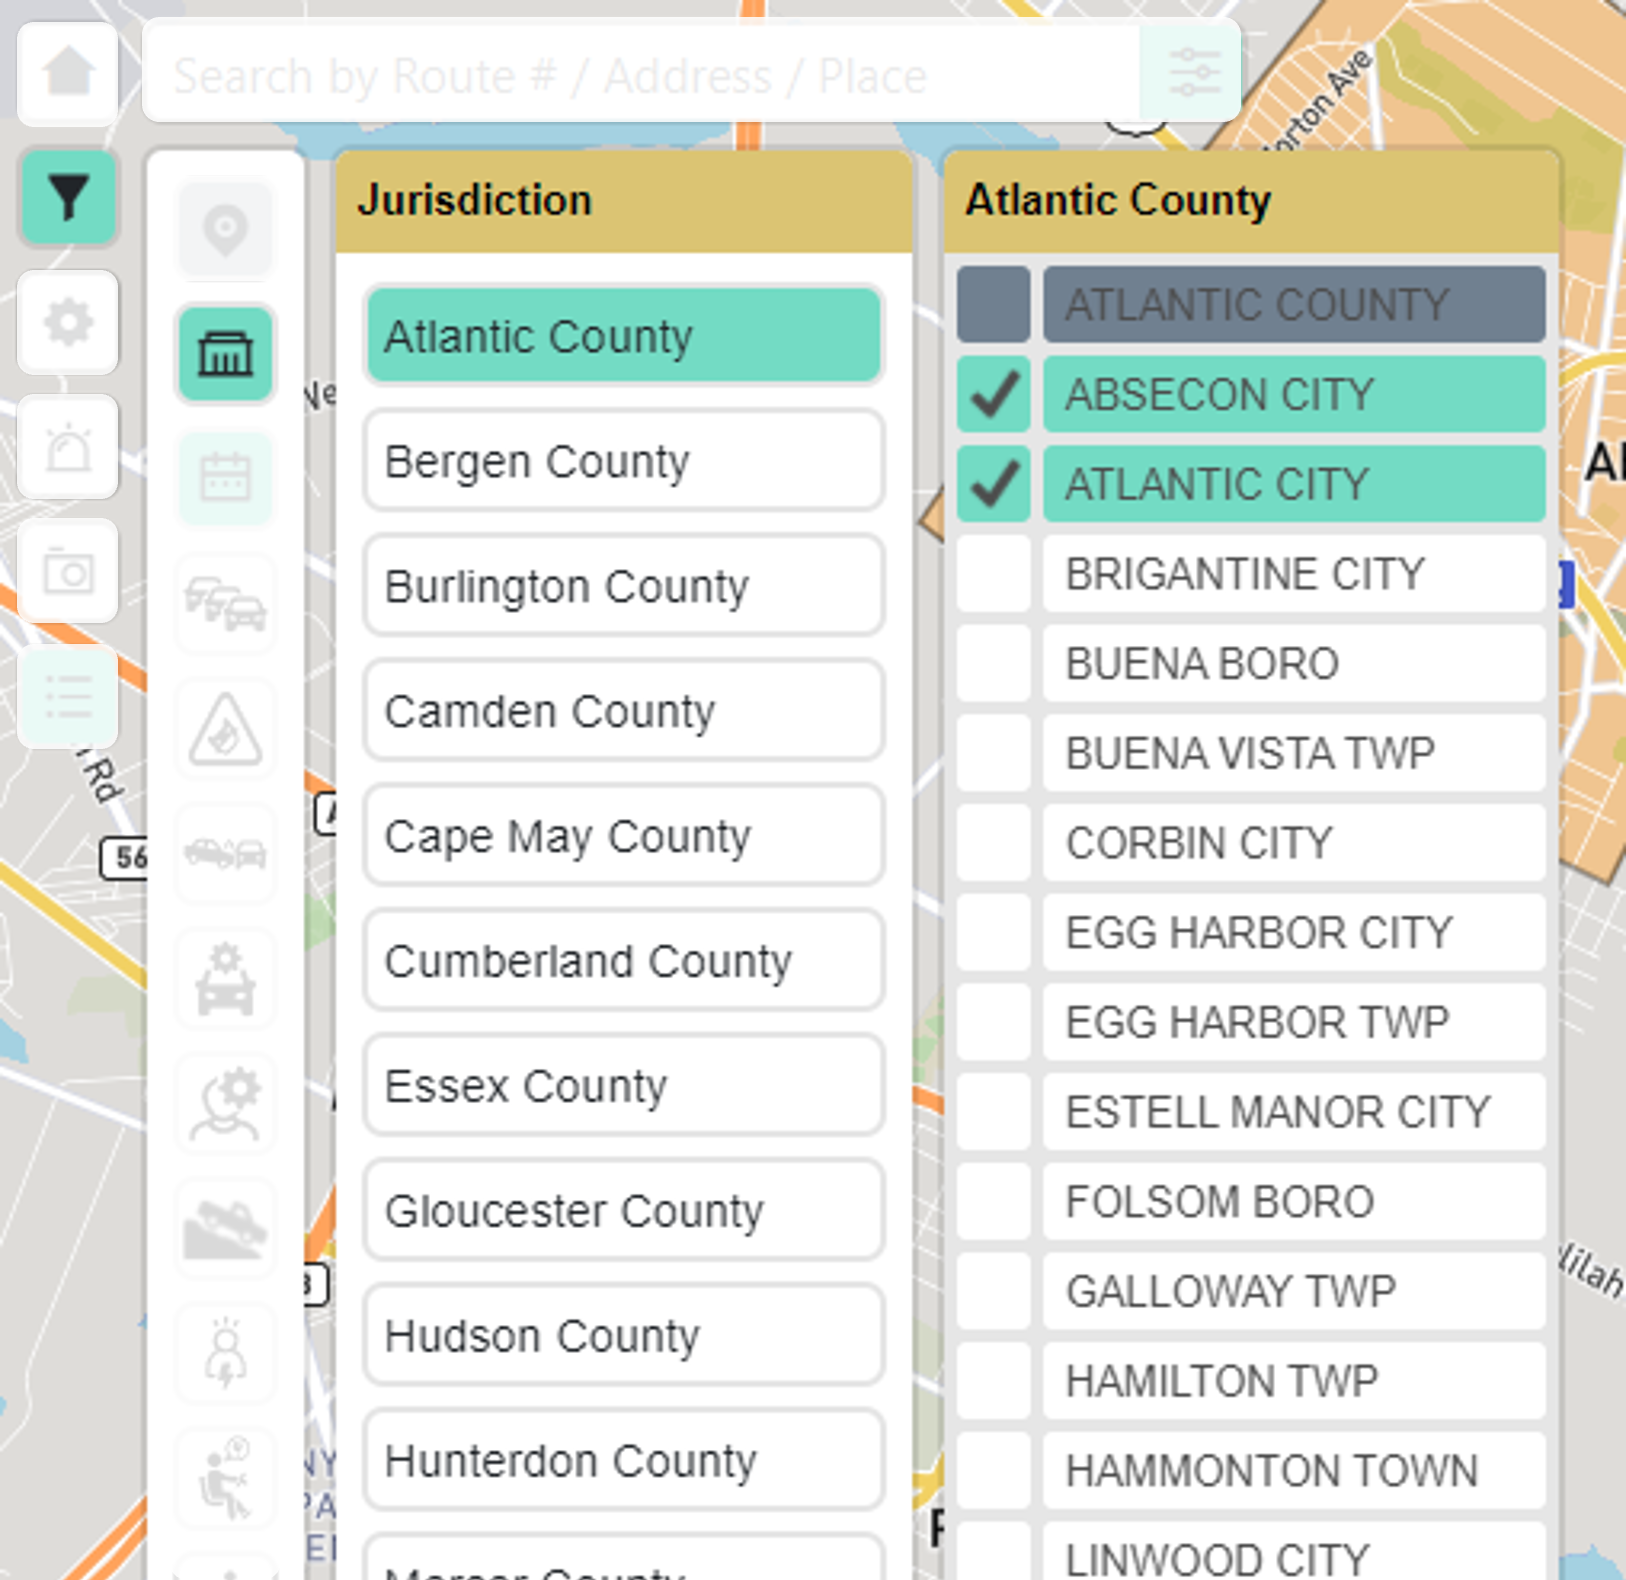
- Click the Filter Menu located on the left side of the map.
- Click the Jurisdiction Menu to open options for counties and municipalities.
- Select one or more jurisdictions. The map will automatically display crashes based on your selections.
Info
You cannot select a mix of counties and municipalities. When selecting counties, all municipality options will be disabled and vice versa.
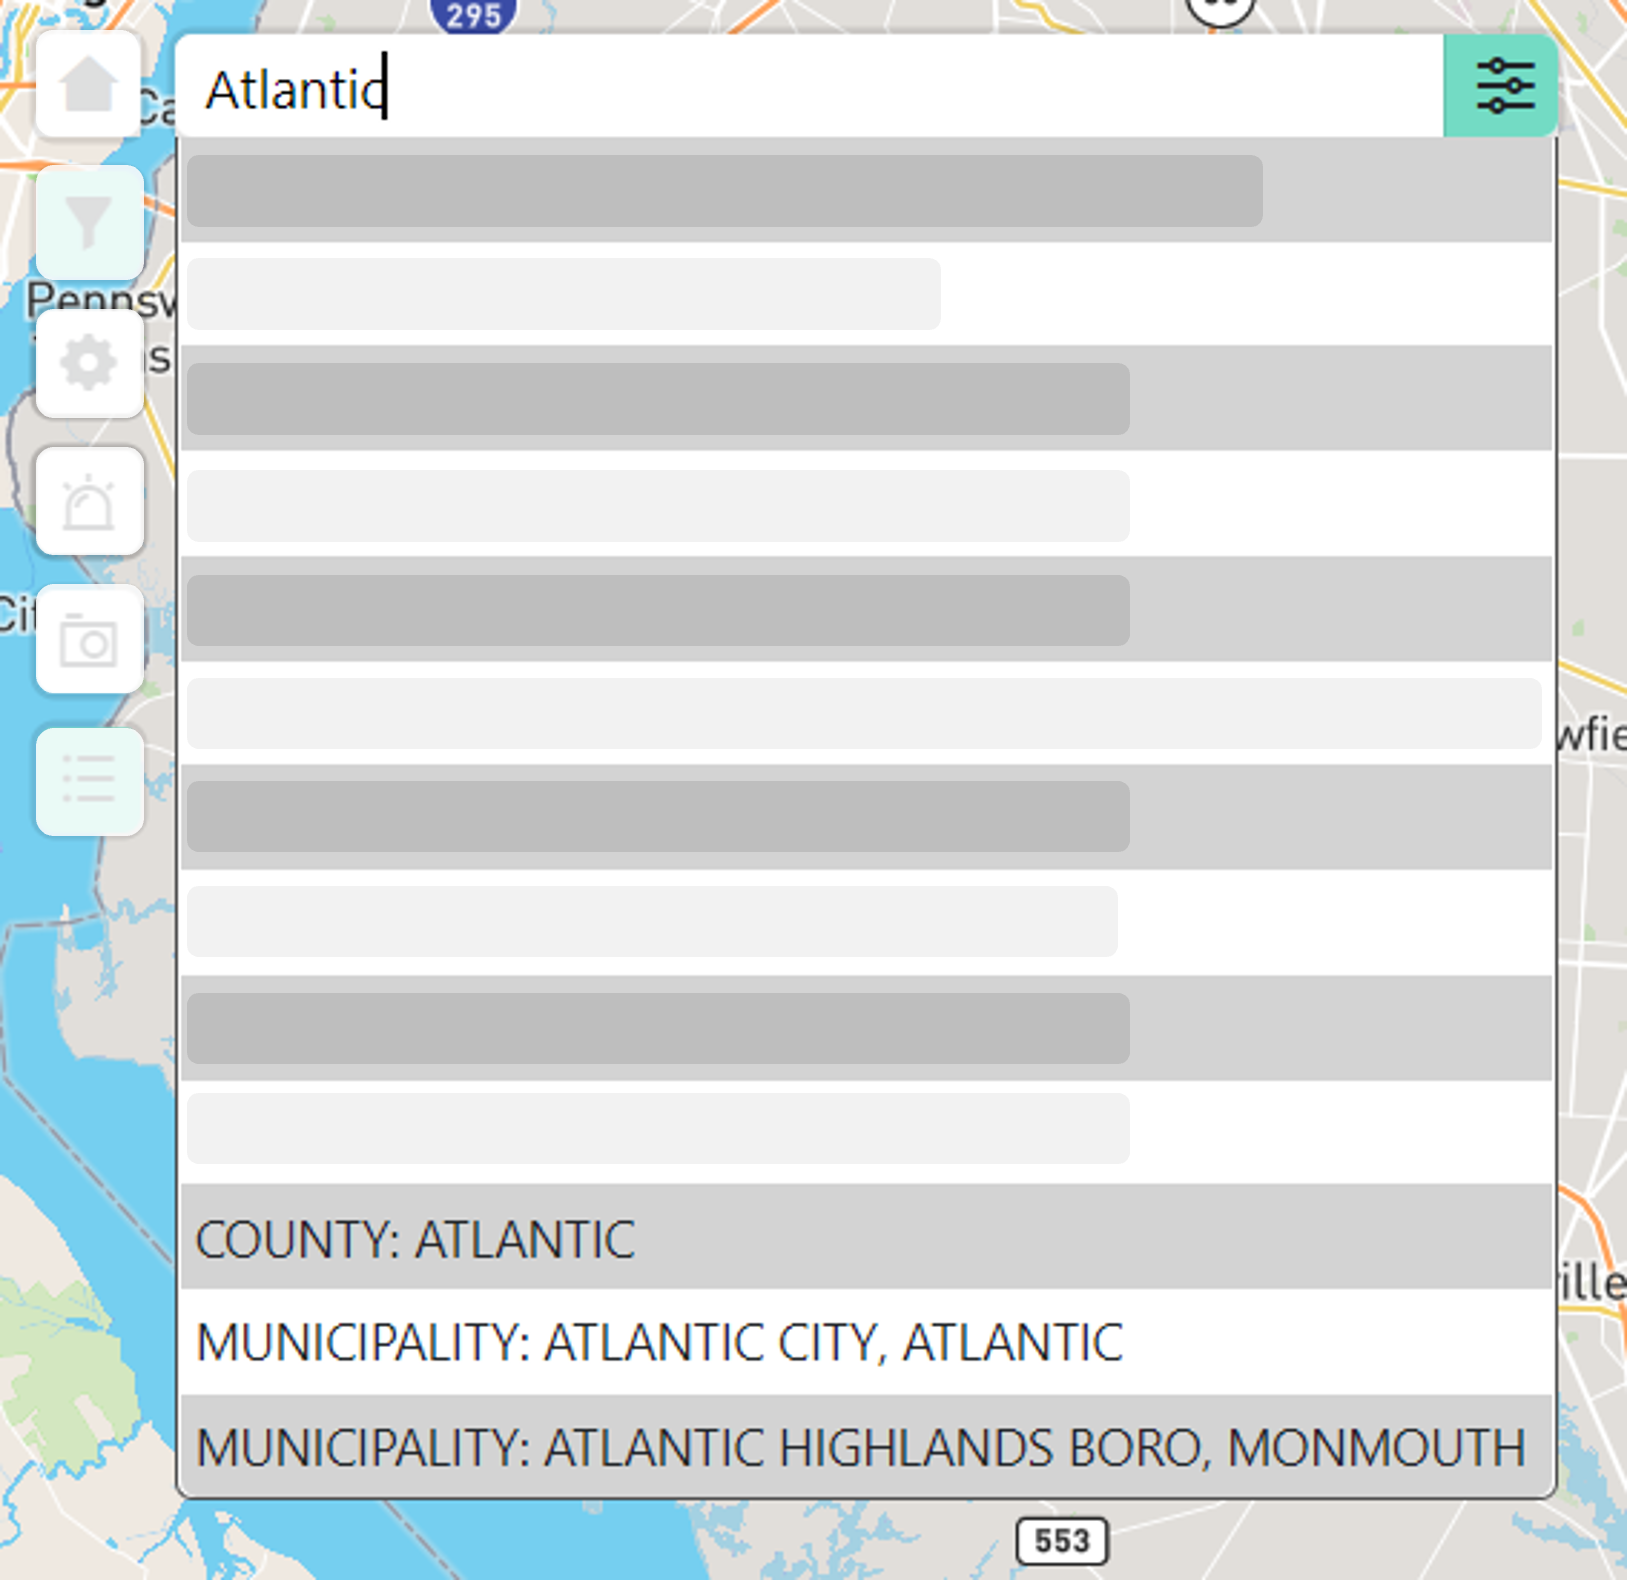
- Type the jurisdiction in the Search Bar to view a list of options based on your query.
- Click on a "COUNTY" or "MUNICIPALITY" option. The map will zoom to the jurisdition and display crashes based on your selection.
Info
The Search Bar can support one selection at a time. To select multiple jurisdictions, use the Jurisdiction Menu from the Filter Menu after selecting a "COUNTY" or "MUNICIPALITY" option.
Search for a Route
Routes can be searched from the Search Bar by inputting a route name (US 46) or a standard route number (00000046__). You can input a number (46) to display a list of suggestions. To search for a route:
- Type a route number or name in the Search Bar. As you type, options will display based on your input.
- Select an "SRI" (Standard Route Identifier) option. The map will zoom to the extents of the route and render as a 3D bar graph.
The location of a bar represents a tenth of a milepost while height represents the number of crashes at that milepost. Bars are colored from red to green with red being mileposts with higher crash counts verses green with lower crash counts.
Filter Crashes using NJTR-1 Attributes
Crash filters can be applied when your map view is displaying county or municipality heatmaps, crash clusters, or 3D graphs of a route. To apply filters:
- Click the Filter Menu to display various filter categories.
- Click on a category to display a menu of individual filters.
- Select any number of filters. Your selections will be highlighted in green and the map will automatically refresh to display crashes with your selected filters.
How crashes are queried when multiple filter categories are selected
When individual filters under the same category are selected, crashes will be queried with the individual filters appended with an "OR" clause. For example:
- Selecting "Wet", "Snowy", and "Icy" under the Road Condition category will query crashes with Road Condition of "Wet" OR "Snowy" OR "Icy".

When selecting filters across multiple categories, crashes will be queried with the individual filters within each category appended with an "AND" clause. For example:
- Selecting "Wet", "Snowy", and "Icy" under the Road Condition category and "Fatal Injury" and "Possible Injury" under the Pedestrian Physical Condition category will query crashes with (Road Condition of "Wet" OR "Snowy" OR "Icy") and (Pedestrian Physical Condition of "Fatal Injury" OR "Possible Injury").

Export Crash Records to CSV
Crash records which contain data from their NJTR-1 form can be exported as a CSV file for further analysis. The exported crash records are based on the crashes currently visible in your map view. A maximum of 50,000 records may be exported at a time. To export crash records:
- Move your map view to encompass all crash records you want to export.
- Open the Results Display on the bottom-left of the map interface if not opened already.
- Click Export Records. The application will take time preparing your export depending on how many crash records are in your map view.
- Agree to the disclaimer to download a CSV file of crash record data.
Info
Exporting records is only avaliable to users working for a government agency. Please see the About section for information on how to gain access to this feature.